Cookies
Our website utilises cookies to improve your experience. By continuing to browse this website, you are agreeing to the use of our cookies.
Accept Our cookies policyOur website utilises cookies to improve your experience. By continuing to browse this website, you are agreeing to the use of our cookies.
Accept Our cookies policyPlease Contact us.
Please Contact us.
Available for purchase atCanon Business Scanner retailers orCANON OfficialStore.
For the foot switch, use a product with a 3.5mm jack. To use a foot switch with a 6.35mm jack, use a converter cable to convert it to 3.5mm. ※Both normally open and closed foot switches can be used.
Foot switch
Compact sustain pedal
Ex. YAMAHA FC5
CASIO SP-3
KORG PS-3
M-Audio SP-1
Converter cable
1/4" TRS to Right Angle 3.5mm TRS Headphone Adaptor Cable
6.35mm(1/4 inch) Female to 3.5mm(1/8 inch) Male Adapter
Ex. Hosa MHE-100.5
CableCreation CC1095
MillSO 3.5mm to 1/4 adapter
TISINO TS9561
Two green LED lights can be seen through the window on the cover. Align the staple with these LED lights.
* Sit facing the machine so that the LED lights can be seen.
Align the top of the staple that can be seen from the outside with the staple position LEDs.
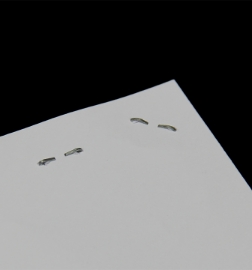
Top surface
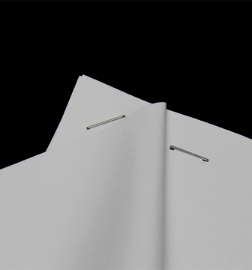
Back surface
Pull out the waste box.
*The LED indicating that waste staples must be disposed may be flashing.
Dispose of the waste staples.
If waste staples remain in the machine, dispose of them while being careful not to injure yourself.
Pull out the DC plug of the power adapter when disposing of the waste staples.
Insert the waste box.
Click below to download the instruction manual.
Open the cover and use a cloth to wipe away dirt on the inside of the cover.
See below for how to open the cover.
Paper is jammed and cannot be removed from inside the machine.
Insert paper into the remover with the staple legs facing upward.
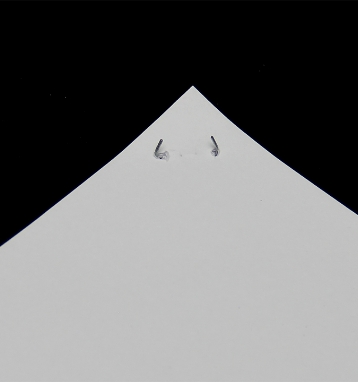
Image picture
Align the staple evenly with the left and right staple position LEDs. Hold the paper with your hand while performing staple removal.

Image picture
Staples may be cut partway if the staples or paper has deteriorated or with some staple types. In this case, remove the staples manually.

Image picture
Staples may fail to be removed if they are too tight or if you cannot hold the paper because the staples are too close to the paper edge. In this case, remove the staples manually.
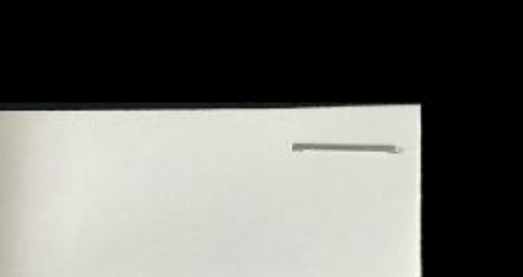
Image picture
If the staples are too close to the edge of thin paper or small stacks of stapled sheets, remove the staples manually.

Image picture
In environments with high humidity, the paper may become damp and get easily damaged. It is recommended that the machine is used in normal temperature environments with normal levels of humidity.
Image picture

Image picture
1. Dispose of staples remaining in the waste box.
How do I dispose of the waste staples?
2. Visually check for staples remaining in the machine from the window on the cover.
3. If there are staples remaining, operate the machine empty a few times by pressing the button with no paper inserted.
The procedure is complete when you remove the staples.
4. If staples still remain in the machine, insert some paper you do not need and perform step ③.
5. If staples still remain in the machine, pull out the waste box, remove the power cord and foot switch, and place the machine vertically.
6. Use tweezers or the like to remove remaining staples. Do not grip staples with your bare hands. Doing so may lead to injury.
1. Pull out the waste box.
*If staples remain in the waste box, dispose of them.
2. Remove the power adapter DC plug from the jack on the electric staple remover.
3. Confirm that the foot switch is inserted into the jack on the electric staple remover.
4. Insert the plug into the electric staple remover and turn the power ON.
5. Insert the waste box. Press the foot switch and check whether the machine operates.
To remove the foot switch, first unplug the power cord. The staple remover may activate the moment the foot switch is removed if the power cord has not first been unplugged.
1. If the LED is flashing, press the button or step on the foot switch. When the LED returns from flashing to being illuminated, the machine has been restored to the usable state. If it does not return to being illuminated, press the button again.
2. Open the cover with a twisting motion using a coin or the like. The cover cannot be opened past the position shown in the diagram.
3. Remove the stapled sheets from the machine.
4. Close the cover. Do not insert stapled sheets with the cover open.
Remove any staples remaining in the device.
If paper is scratched by staples.
1. Follow the procedure to remove the paper.
Paper is jammed and cannot be removed from inside the machine.
2. Check for staples remaining in the machine. Follow the procedure to remove staples if they remain.
Dispose of the waste staples.
Check the following. If the LED still does not illuminate, request a repair.
Check whether the power cord is inserted.
Check whether the cord is securely inserted to the adapter and that the plug has been inserted to the outlet.
Check whether the waste box has been inserted in all the way.
Check whether the cover has been closed.
There are four LED states: illuminated, flashing with pattern 1, flashing with pattern 2, and not illuminated.
Illuminated
Normal status where staple removal operations can be done.
Flashing pattern 2
The remover stops working before removing a staple.
If the problem persists, request a repair.
Paper is jammed and cannot be removed from inside the machine.
Off
The power cord is unplugged, the waste box is removed, the cover is open, or the LED is malfunctioning.
The machine does not operate when the button is pressed (the LED does not illuminate)
The waste box may be stuck because it contains too many waste staples. Hold up the rear side of the machine and pull out the waste staples.
Request the place of purchase to repair the product. If you have any questions regarding repairs, please Contact us.
After removing staples, paper may be damaged and become stuck together. Fan the stapled sheets to separate the sheets and perform scanning again.
To reduce damage to the paper, make sure to align the staple in the correct position for removal.
If only one side of a staple remains and heavy damage is caused to the paper.